Launching a Shopify store might seem overwhelming at first, but honestly, once you break it down, it’s not that hard. There are levels to it: sign up, set up your look, add products, get your business details straight, and hit launch. Each step has its own job in making sure your store actually works and stands out.
Here’s a real guide to getting your Shopify store off the ground, minus the fluff.
Step 1: Get Started – Sign Up and Make a Simple Plan
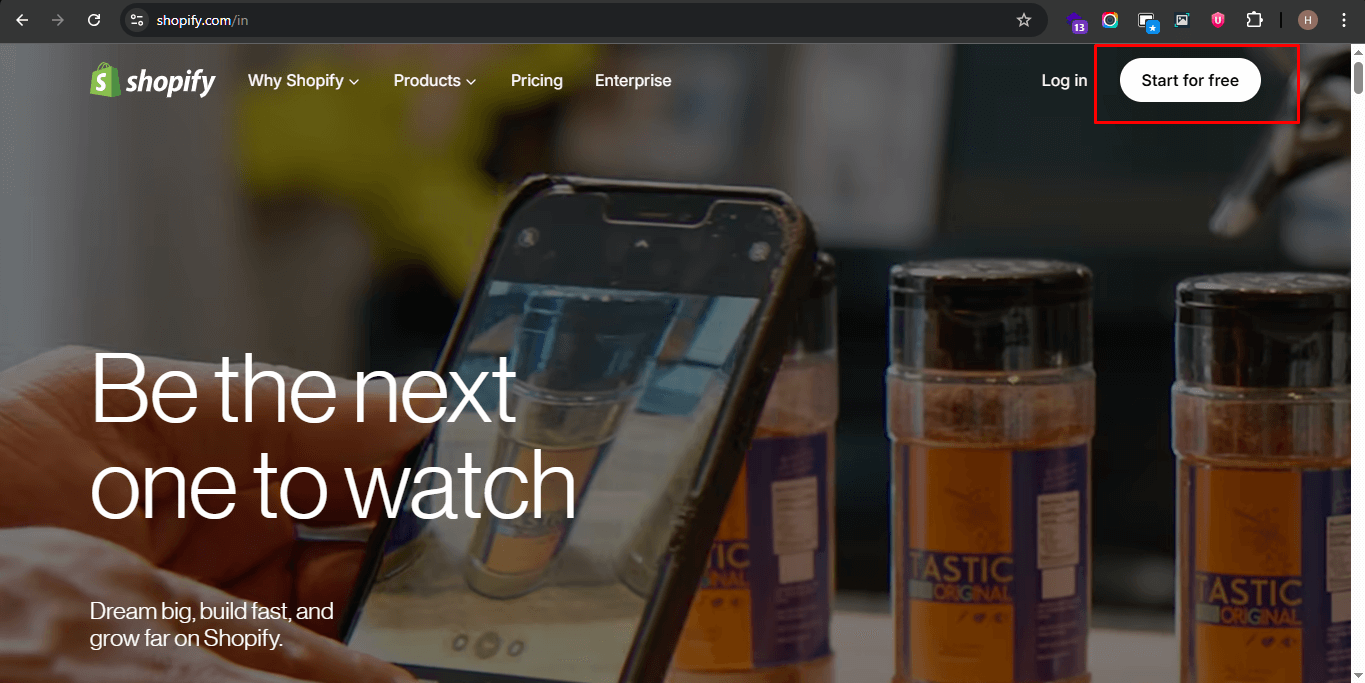
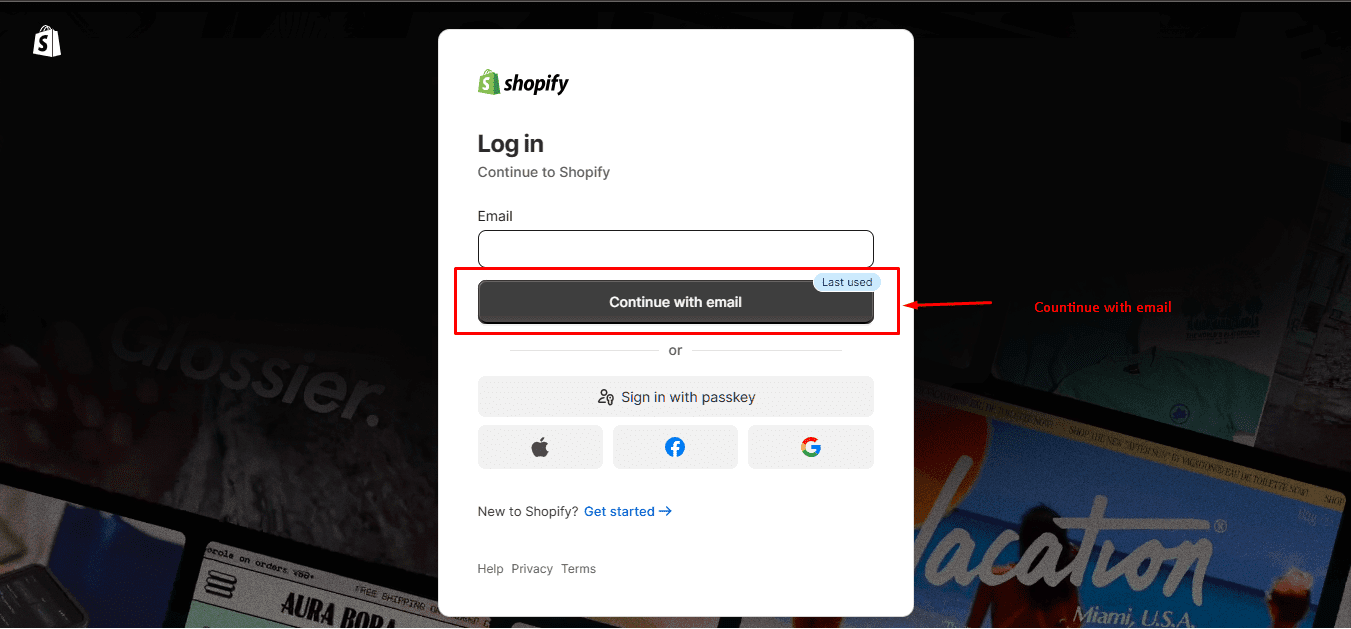
Head over to Shopify and create your account. If you’re just testing things out, use the free trial; it’s there for a reason. As you register, think ahead a little:
Pick a store name that fits your brand and feels like something you’d want.
Add your business address and other details(you’ll need them for shipping and taxes).
Choose your currency and time zone, which count more for your customers.
Before you begin designing, plan out the basics: Who is your save for? What are your foremost merchandise? Why might a person select you over the competition? Sorting early saves you a ton of complications later.
Step 2: Pick a Theme and Make It Yours
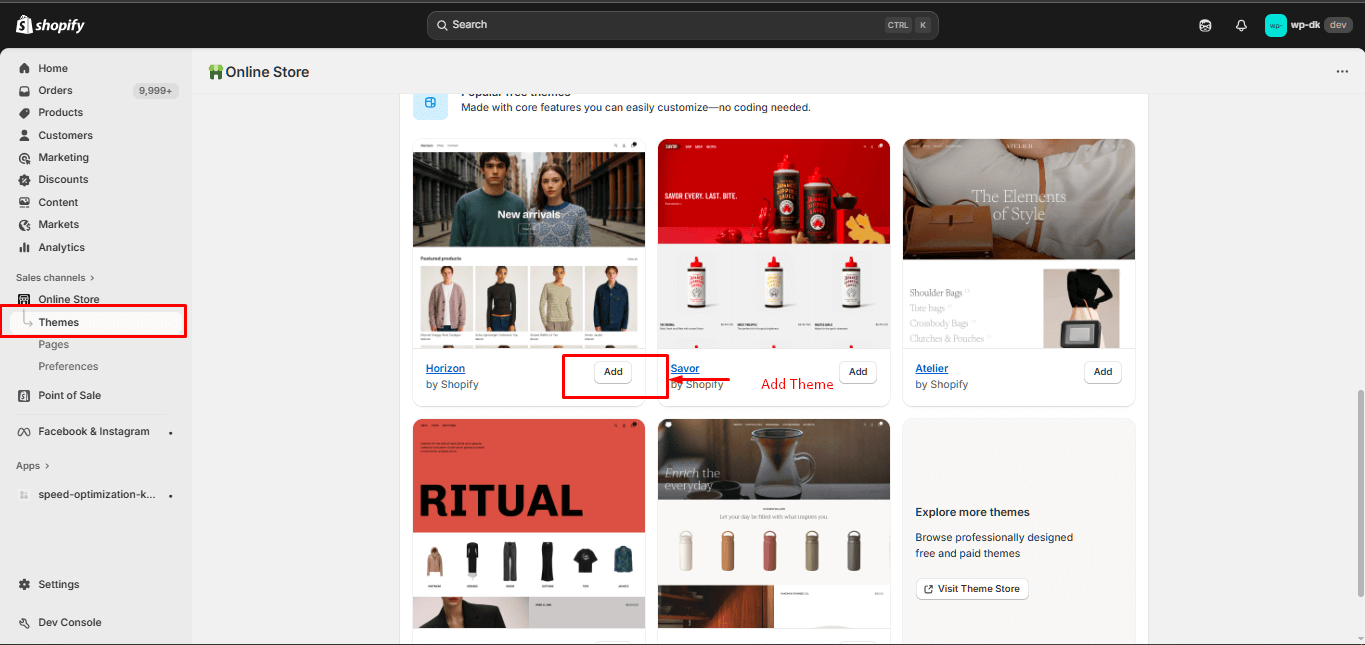
Shopify has a number of themes, both free and paid. Go with one that fits your vibe and the customers.
When you`re selecting a theme:
Make sure it looks good on mobile. Most of your customers are on their phones.
Check how it shows off your product pages; if photos matter, pick a theme that puts them front and center.
Peek at the theme’s reviews for speed and flexibility.
Once you’ve picked a theme:
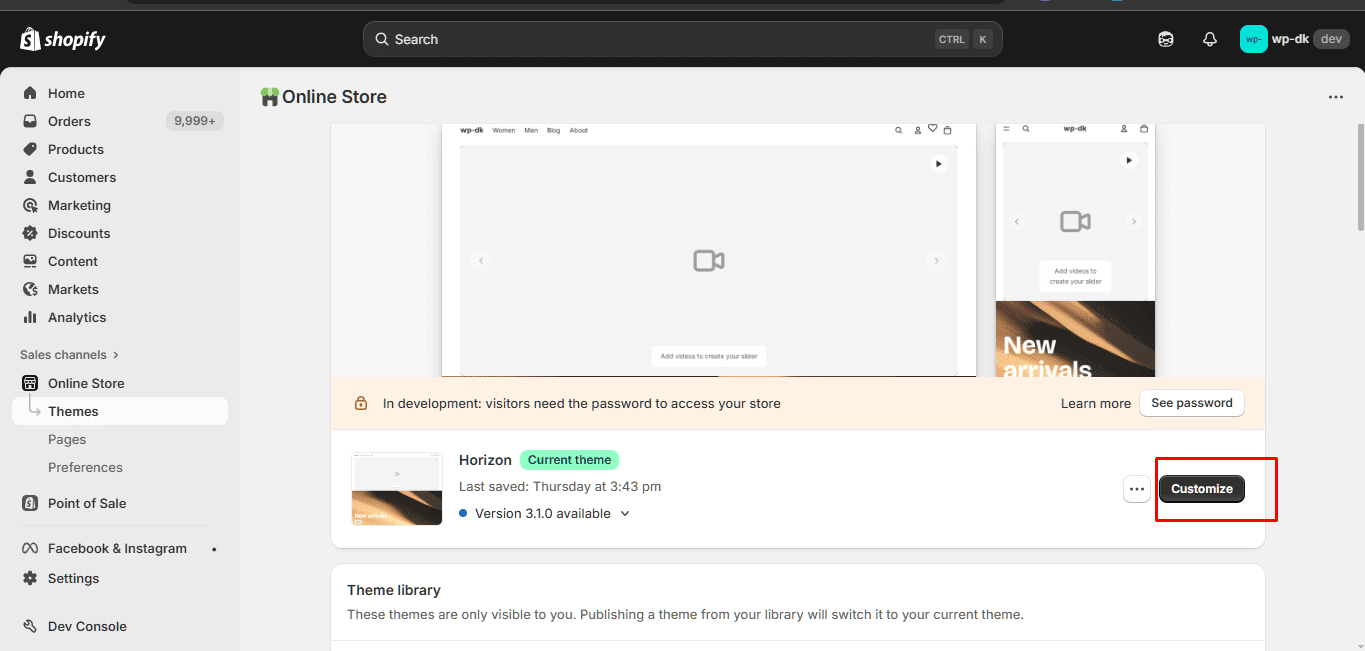
Hit “Customize” in Shopify’s theme section.
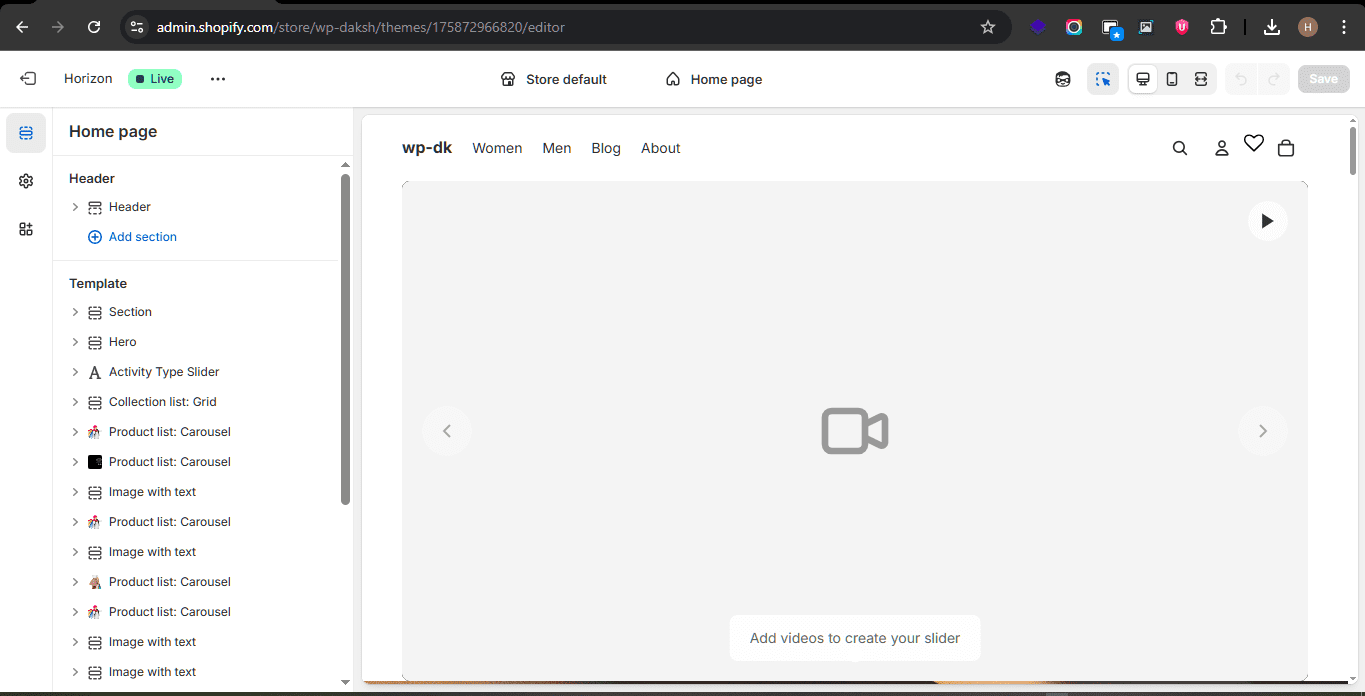
Use the editor to tweak colors, fonts, and sections to shape your style.
If you need more control (suppose touchdown pages or custom layouts), try a drag-and-drop web page builder that needs no coding.
Step 3: Lock In Your Brand Style
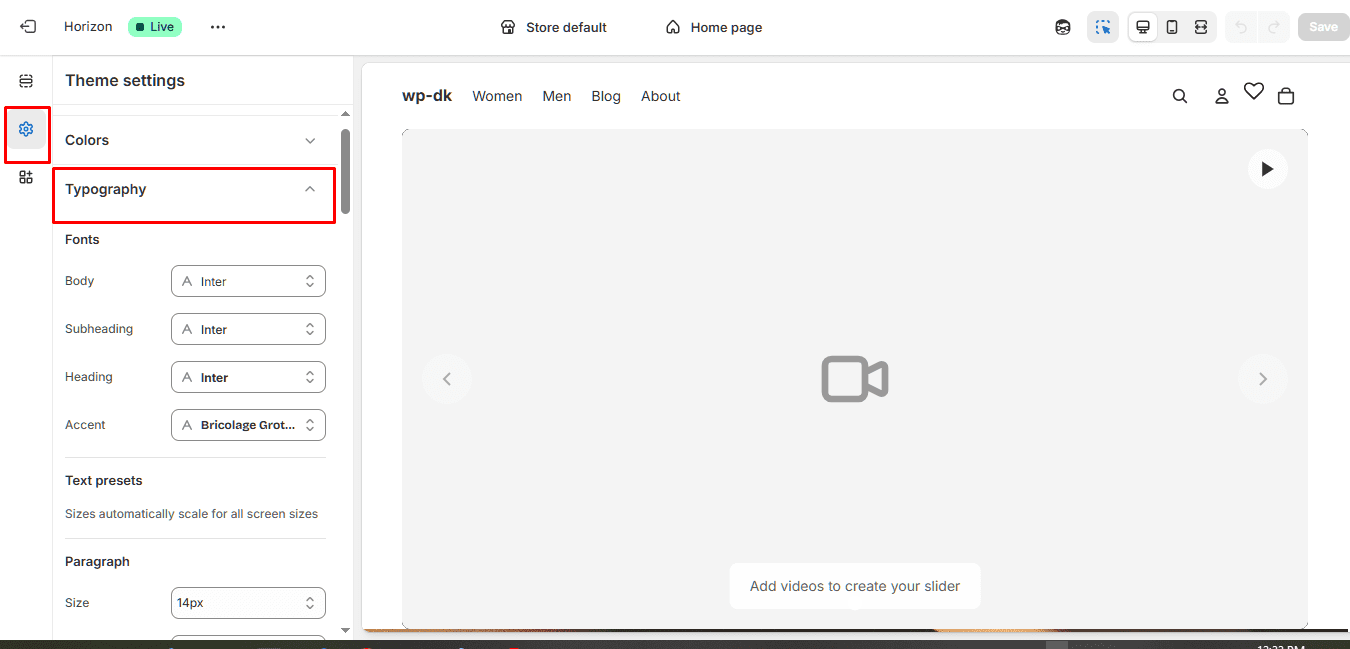
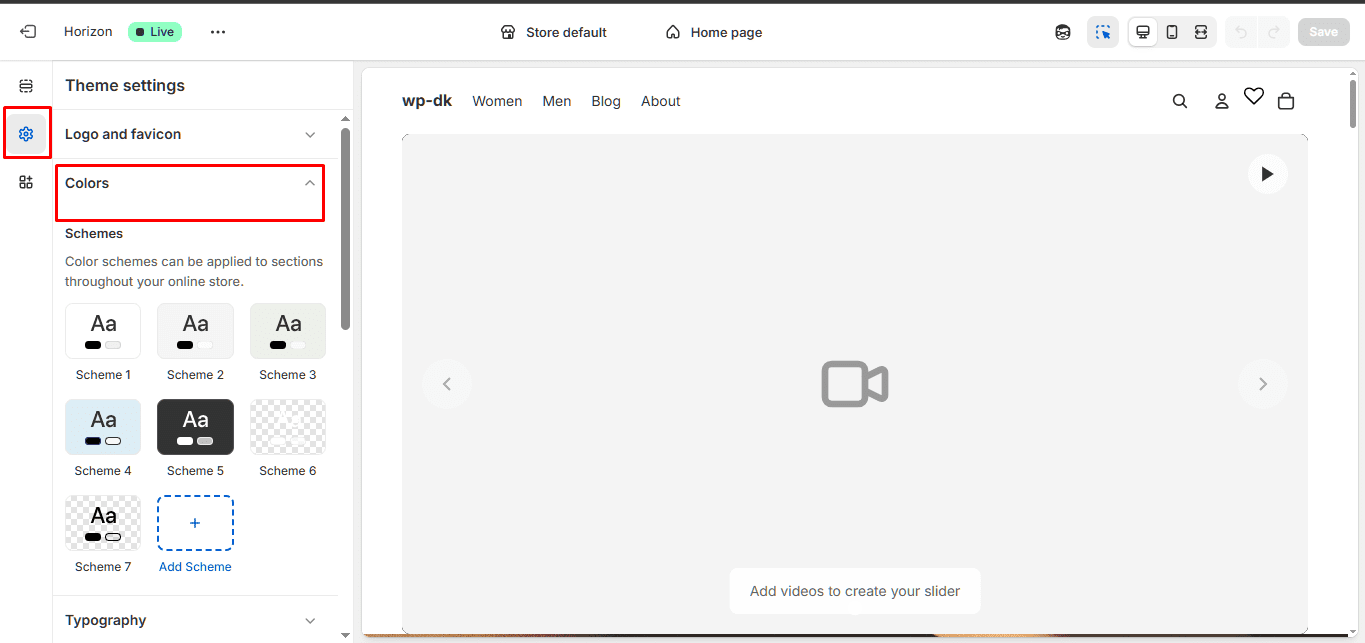
You don`t have to move wild with design; however, an easy style manual helps a ton. Pick out a few foremost colors. Choose fonts that are smooth to study and stay with them. Decide on a tone, are you fun, fantastic, professional, or quirky? Whatever you select, make it consistent. It builds trust.
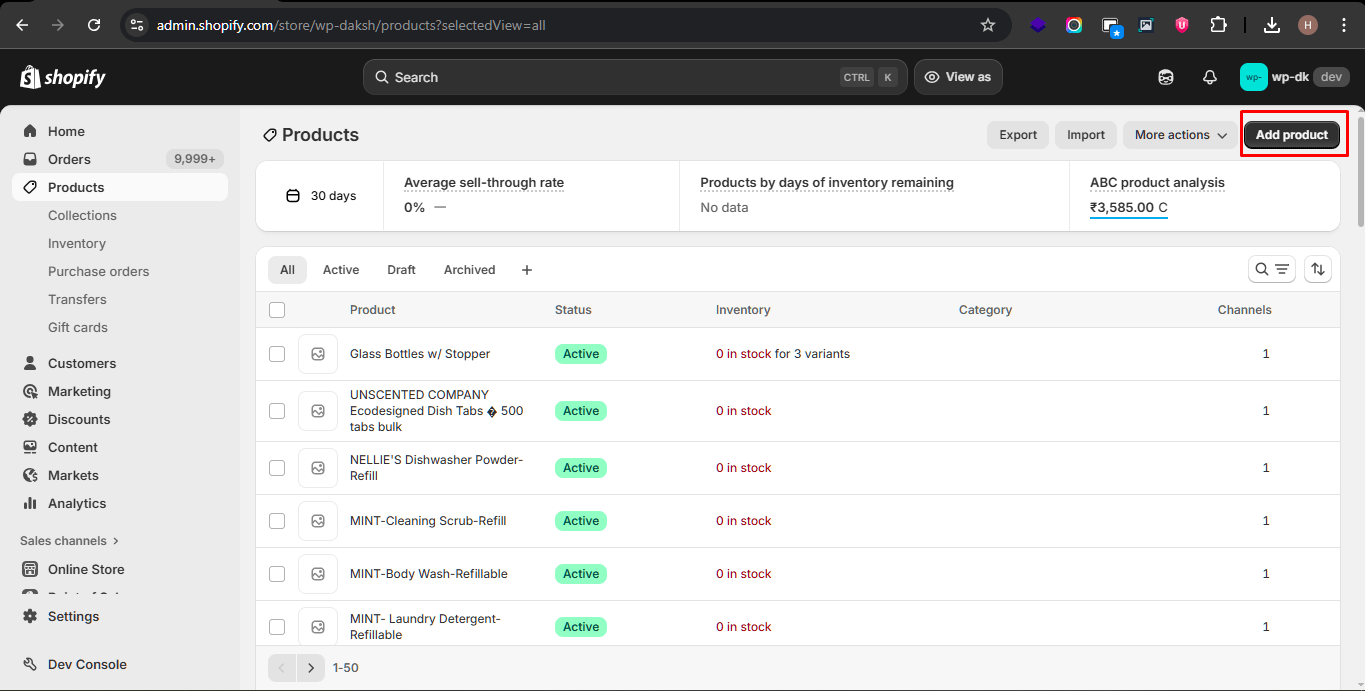
Step 4: Add Products with Care
Now for the main event, your products.
For each one:
Upload several high-quality photos from different angles.
Write clear, honest titles. Let people recognize what it is and why they must care.
Describe the pros up front, then get into the information and specs.
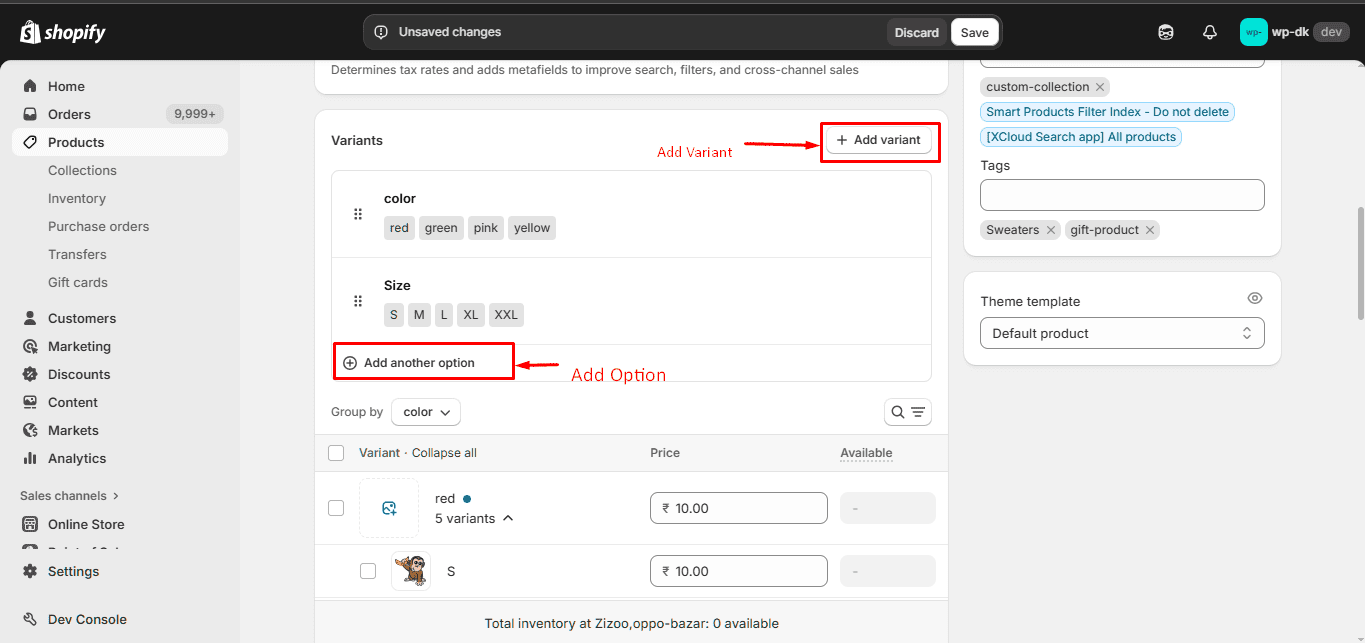
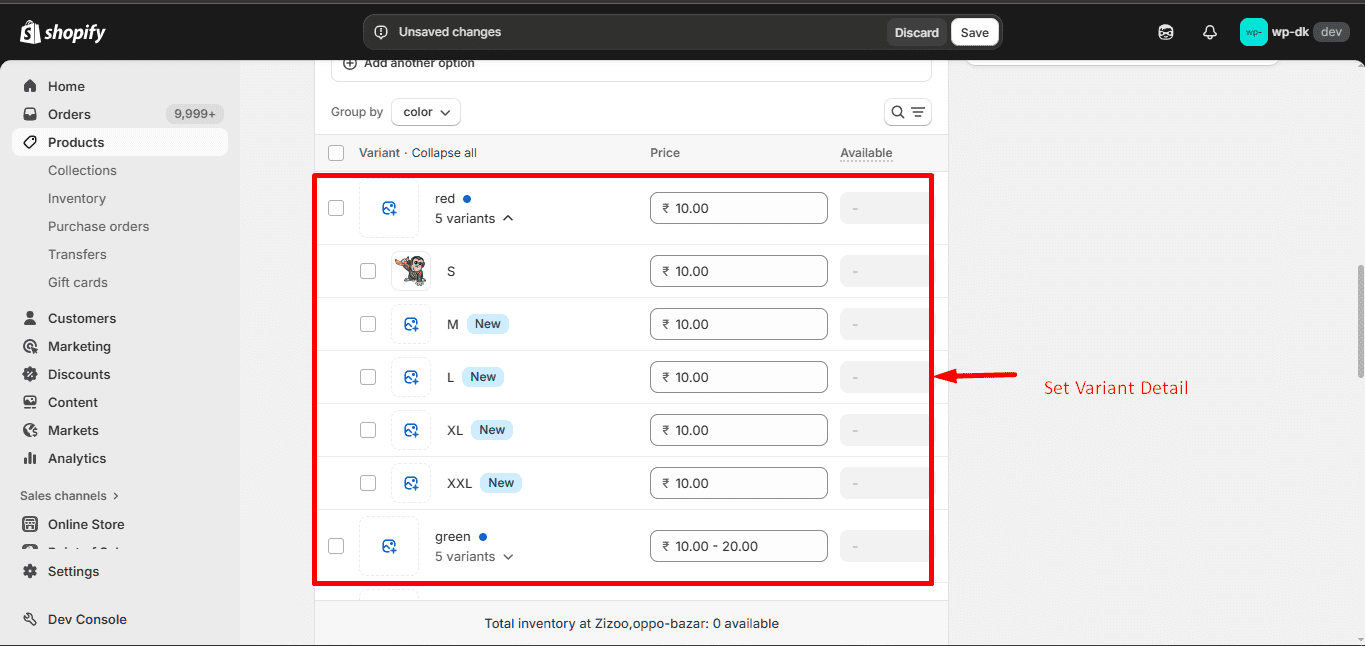
Set variants for size, color, or whatever options you’ve got.
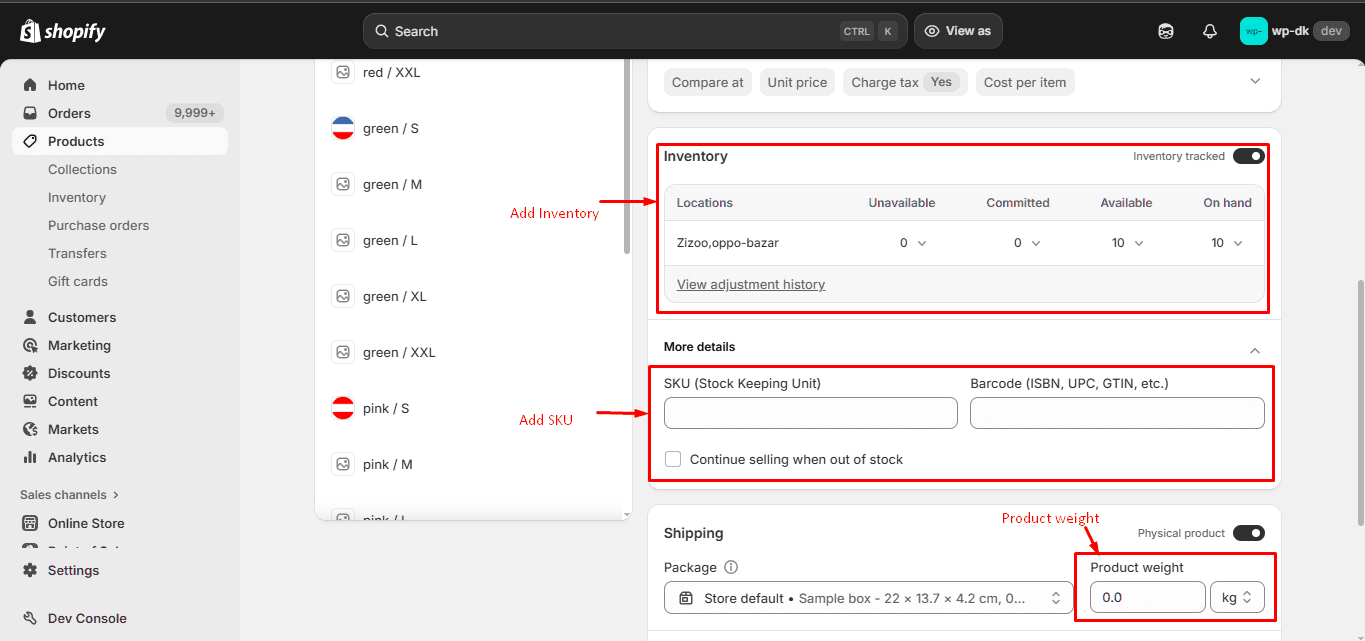
Add inventory numbers and SKUs.
Enter each product’s weight, which matters for shipping.
Group merchandise into collections, like “New Arrivals” or “Best Sellers.” It facilitates people to browse and maintain your store and keeps it organized.

Step 5: Set Up Payments, Shipping, and Taxes
This part isn’t glamorous, but it’s crucial.
Payments: Turn on the payment alternatives you agree with, Shopify Payments, PayPal, something that works for you.
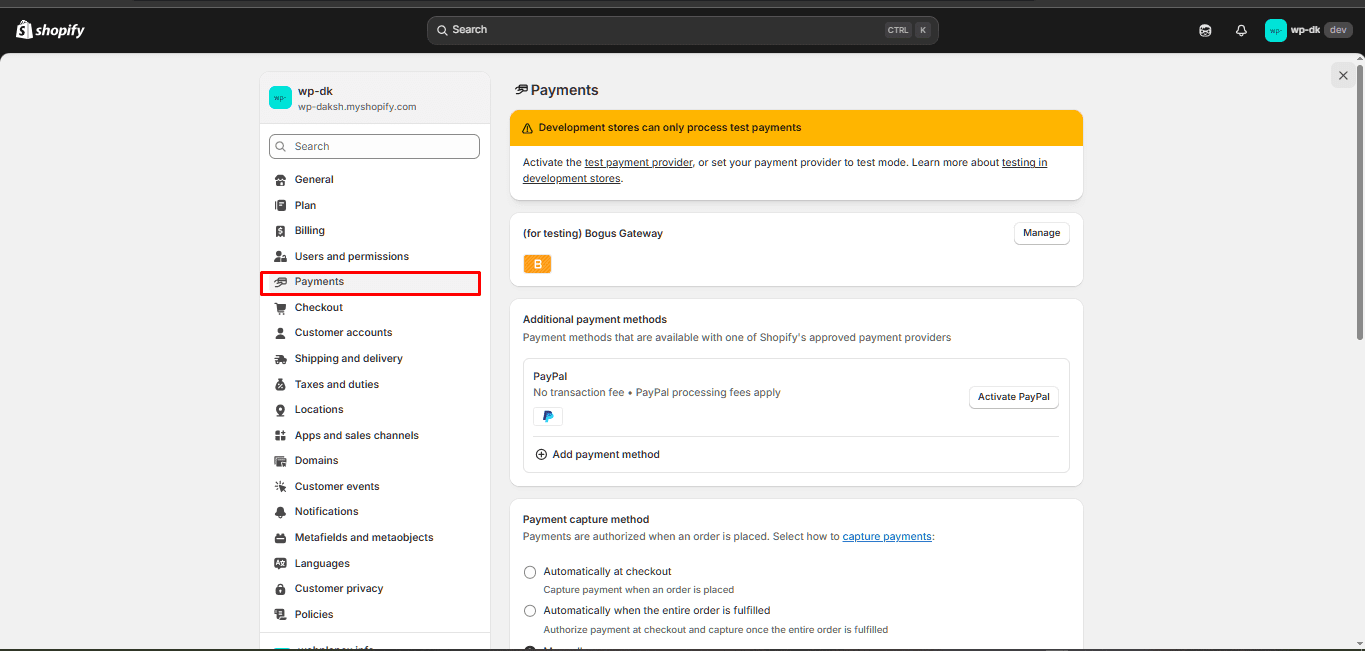
Enable rapid checkout alternatives like Shop Pay or Apple Pay. They make shopping easier.
Shipping: Decide how you’ll charge: flat rates, real-time rates from carriers, or maybe free shipping over a certain amount.
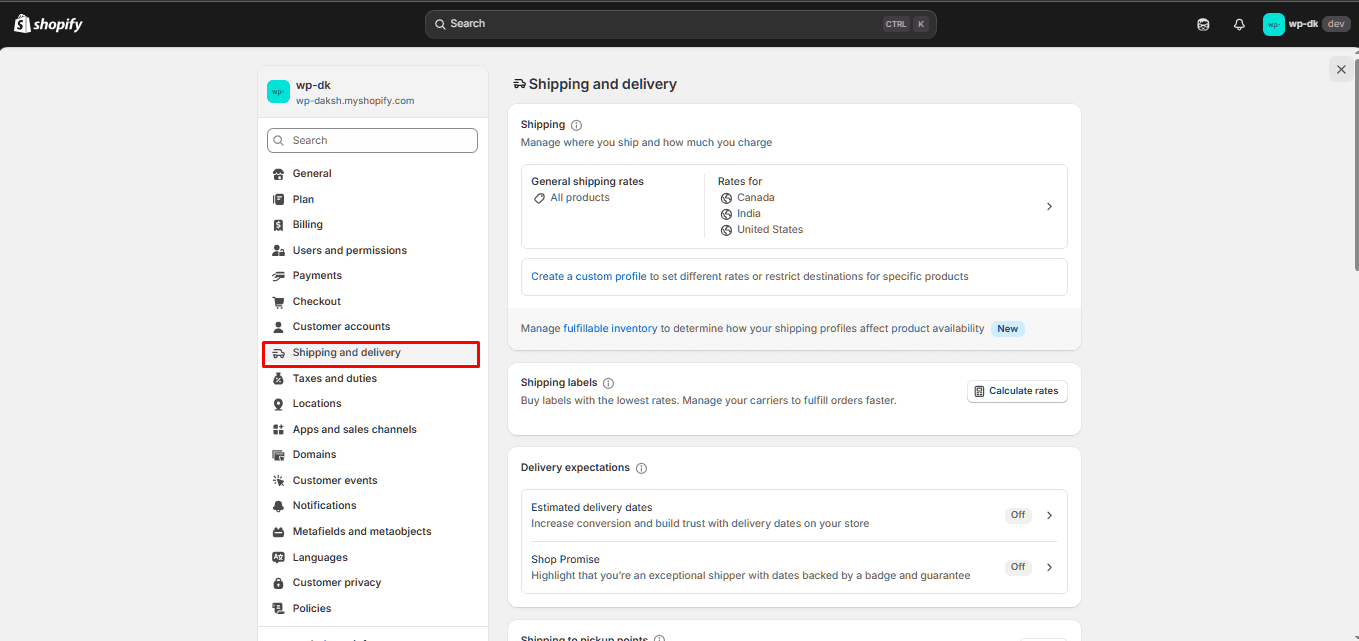
Set your handling time. How fast can you ship?
Add your shipping origin address so rates are correct.
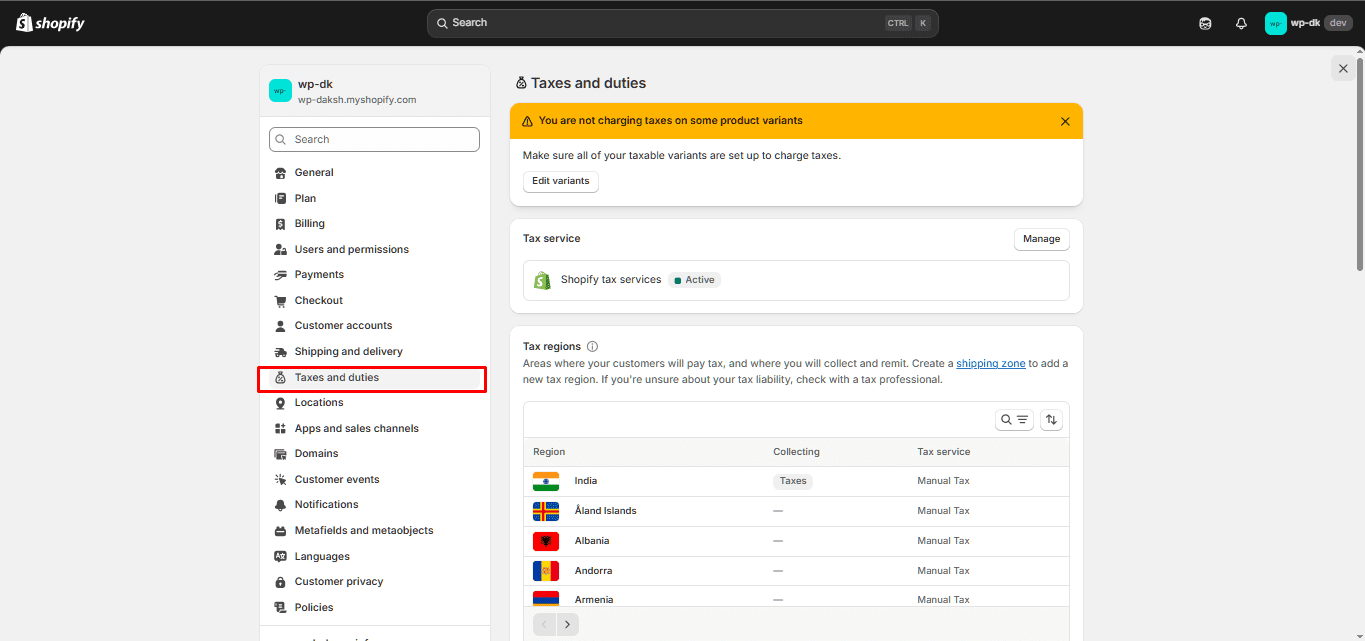
Taxes: Set up tax rules that fit where you’re shipping.
Double-check Shopify’s automatic settings, especially if you sell internationally.
Step 6: Build the Key Pages and Store Policies
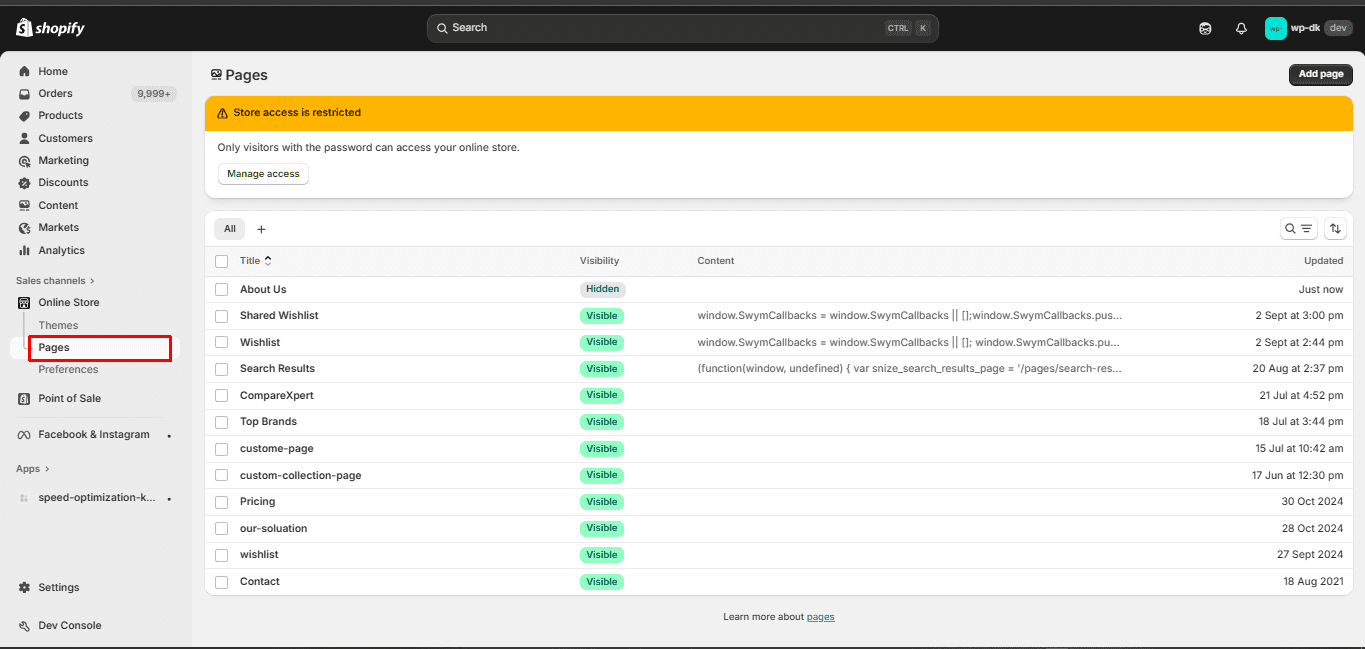
Your shop needs more than just a product lineup. Make sure you have:
A home web page that grabs attention, showcases your great products, and highlights what makes you unique.
An about page that tells your story, really and honestly.
A contact web page allows customers to understand the way to contact you (e-mail, form, social, or something you use).
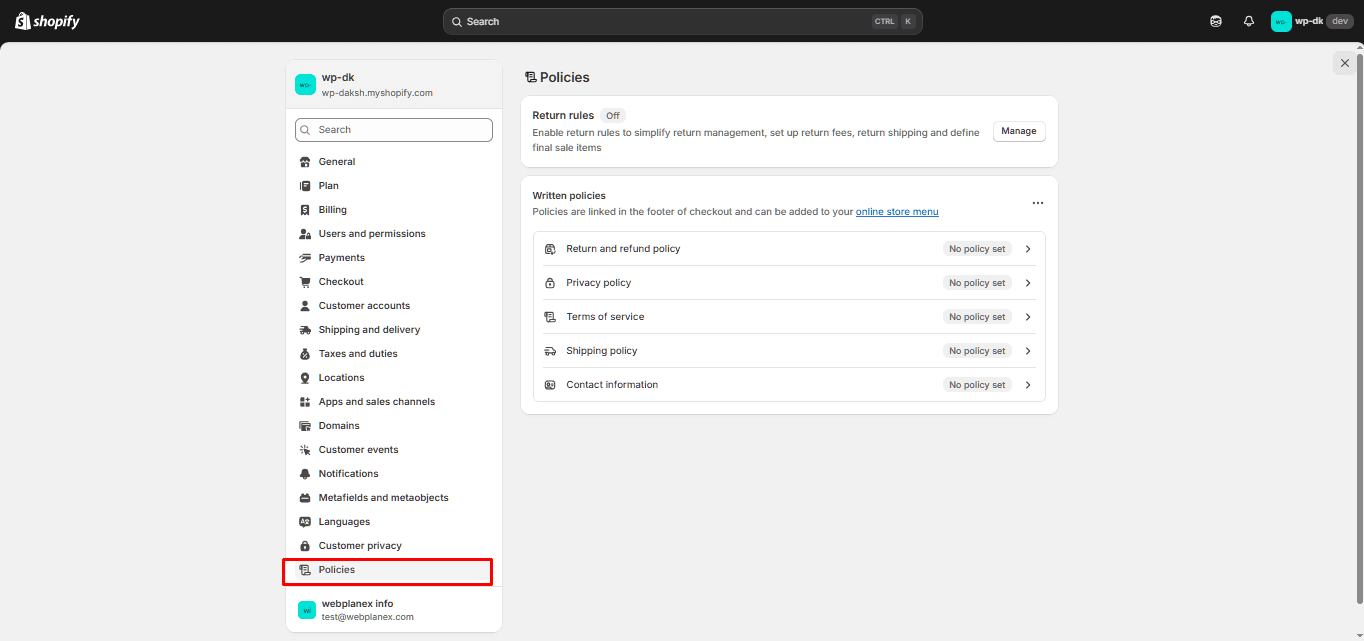
Policy pages, shipping, returns, privacy, terms of service. These aren’t optional if you want people to trust you.
Use Shopify’s editor to lay out these pages.
Step 7: Optimize for Speed & Performance
Slow websites lose customers, so don`t play around here.
Start by compressing and resizing your product image before adding it to your store. Try apps like speedboostr for automation and no hassle.
Use lazy-loading for images that take a seat down underneath the fold, in order that they don`t delay the primary load.
Keep your Shopify apps in test; each one provides code, and too many will gradual you down.
Dig into your subject settings. If speed matters, pass heavy animations and huge video backgrounds.
Always take a look at your store`s speed on mobile, not on tools but on a real phone.
Download the Speed Optimization app for your store here:
https://apps.shopify.com/speed-optimization-webplanex
Step 8: Set Up Analytics & Tracking
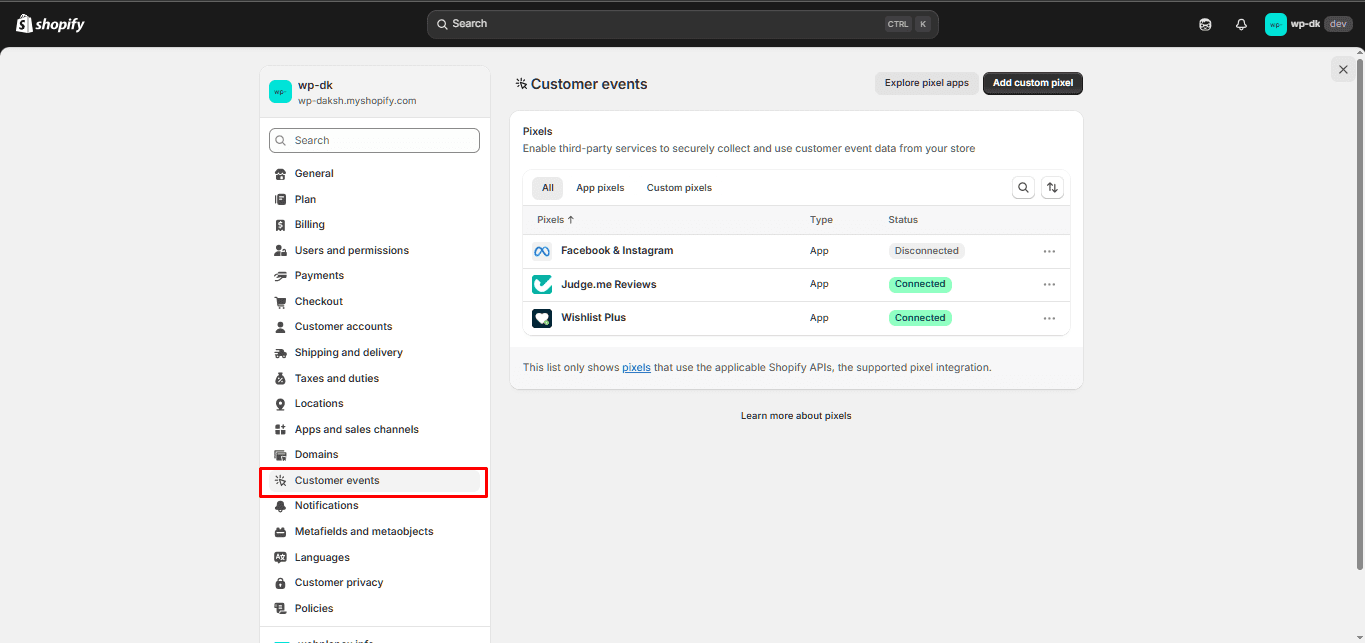
You can`t develop what you can`t measure. Before you send any traffic, set up Google Analytics 4 (GA4) and installation conversion monitoring for purchases.
Add the Facebook/Meta Pixel so that you can retarget customers later. Use Shopify`s integrated analytics to tune web page views, orders, and client behavior.
Run some take a look at orders to make certain the entirety works, mainly that your thank-you page fires conversions and all activities get tracked.
Contact Professionals for Accurate Analytics and Tracking here:
https://www.webplanex.com/hire-developer/hire-shopify-developers/
Step 9: Test Everything (Yes, Everything)
A lot of people skip this part, but don’t be that person. Place a real or test order from start to finish, on both mobile and desktop. Go through checkout, payment, and the thank you page. Try canceling or refunding an order if you can.
Once you post your changes, click through each web page to be certain nothing`s broken.
Test all email notifications, order confirmations, shipping updates, the whole deal. Fix any bugs or weird layout issues now, not later. You’ll thank yourself.
Step 10: Launch Your Store & Plan Your First Moves
Ready? Time to go live. Here’s how to make your launch count:
Tell your email list or social fans your store is open. Give early buyers a purpose to shop for with a release bargain or free shipping. Watch your first week`s analytics like a hawk: traffic, conversions, and jump rates. Ask friends or early clients to shop for something and proportion sincere remarks on each the layout and the buying experience.
Don`t simply take a seat after release. Tweak matters. Use your analytics to enhance product pages, alter transport or pricing, and make your client’s adventure smoother.
Step 11: Maintain & Scale
Launching is just the beginning. Now comes the real work: growing.
Keep an eye on the top sellers. Add new collections to keep things fresh. Use email data to set up retention flows, welcome emails, cart recovery, that kind of thing. Stay on top of theme and page builder updates. And clean out old or unused apps as you go. Simpler is better.
Common Mistakes to Watch Out For While Making a Shopify Store
You’ll see these same issues appear again and again:
Over-designing—too many flashy elements slow down your site and confuse shoppers.
Ignoring mobile—if your store isn’t great on a phone, you’re losing a huge chunk of your audience.
Unclear value—if people don’t get what you’re selling right away, they’ll bounce.
Hidden costs—surprise shipping or taxes at checkout kill conversions.
Bad product images—blurry or sparse photos make people hesitate.
Skipping analytics—if you`re no longer tracking, you`re guessing.
Fix these early, and running your store gets a whole lot easier.
Final Thoughts
Think about it as building a business, not just a website, when setting up your Shopify store. You’ll need to put in the effort to brand your store, then choose a theme that fits, and add products in a way that feels intuitive. Coming hotfooting through the backdoor of payment and shipping settings to ensure everything runs smoothly is a must, and a thorough test is the only way to ensure your store is spotless before you launch. Once you’ve gone live, you’ll be counting on data to tell you what’s working and what isn’t, not just gut feelings.
Keep your eyes on the essentials. Clear messaging, a little patience, and finding the proper blend of pace and style. That`s the way you become with a shop that doesn`t simply appear superb, but absolutely sells.


