Starting an online store for entrepreneurs has become much easier. All credit goes to the feature-rich Shopify platform, which allows you to set up an online store without any need for technical skills.
Wondering if there’s a cost to set up a Shopify store? The good news is, it’s free! You don’t need to spend a penny to get started.
Setting up a Shopify store is not as difficult as you might think. With the use of the right tools and proper guidance from Shopify expert developers, it gets much easier to design your Shopify store that is both professional and eye-catching.
In this blog, we will reveal the steps involved in setting up your Shopify store, one by one, ensuring a smooth and easy journey.
The Importance of Having a Shopify Store
As per a recent study, Shopify is a rapidly growing platform in the field of e-commerce. In the last couple of years, the popularity of this platform has dramatically soared due to its user-friendly nature and top-notch built-in marketing tools. Sellers choose Shopify over other platforms to sell their products online and generate more revenue.
Having a Shopify store is essential to growing your business rapidly. It boasts a user-friendly interface. It offers a variety of marketing tools that play a crucial role in maximizing your sales.
What are the Steps to Setting Up a Shopify Store?
1. Register for a free Shopify Trial:
The first step involves visiting the Shopify website and registering for a free Shopify trial. This platform offers extensive support and essential resources to create your dream online store very quickly. But remember one thing, build your store within two weeks to avoid additional charges.
The process of Shopify free trial registration is quite easy, without any need for a credit card.

2. Sign up for a Shopify Account:
It is a smooth process to set up your Shopify account. You can proceed by completing the sign-up form with the essential business information mentioned in it. Next, go to the Shopify home page and click the Get Started button. After clicking on it, a form will appear asking you to enter details like your email address, password, and the name of your store. Make sure that you provide a unique store name that isn’t already in use on the platform.

An interesting thing to note here is that by creating a Shopify account today, you will receive a complimentary 3-day free trial and become qualified to pay only $1 for the initial 3 months.
Once you finish this step, Shopify will ask you to provide some personal details. Although it is not mandatory, it can help Shopify with the required customization to improve your business. You can skip this option if you don’t find it useful. Then provide your commercial address and contact details to go ahead with the required customization of your online store.
3. Make sure you complete Shopify Store Basics:
After accessing the Shopify store, you will find a menu, which includes different tools and features like orders, products, and customers. There is a Settings button, which helps you change the name of your store, set a time zone, and choose the currency you like.

4. Select the Shopify Theme:
First of all, you need to define your business type and what kind of products you are going to sell. Choose a theme relevant to your business. Additionally, it should be responsive on mobiles, as customers prefer smartphones for online purchases. Currently, there are only 4 free themes available in the Shopify theme store.
To choose a Shopify theme, you need to click on the Online Store. After clicking on it, you will find the Themes option in the drop-down menu.

From this point, you have the option to filter the search results to find the most suitable match. Once you’ve identified the perfect theme, you can apply it to your Shopify store by selecting Try Theme within the chosen theme.
5. Customize the look of your Store:
After you have chosen the right Shopify theme, you can start customizing the appearance of your store. Let’s know how it can be done.
Firstly, go to the Shopify store dashboard and click on the Customize button. After clicking on it, you will get an editing interface, which allows you to customize your content and design. Then click on the Save button to save your changes.

6. Add Products:
The next step is to add products to your Shopify store. For this, you need to go to the Products section and click on the Add Product button. Then give a suitable name to your product with all essential information like product description, product category, inventory, and product color and size.
After submitting this detail, check the product status to see whether it is in Active mode or not. After making sure that it is in Active mode, click on the Save button.

7. Create Product Collections:
Creating product collections is an easy process. It is typically a set of products. You can consider them as categories.
Enter the Collections sub-section and select the Add a new collection button. Then assign a name to the newly created collection, save it, and proceed to add your products. Finally, your new collection is now set up and ready to go.
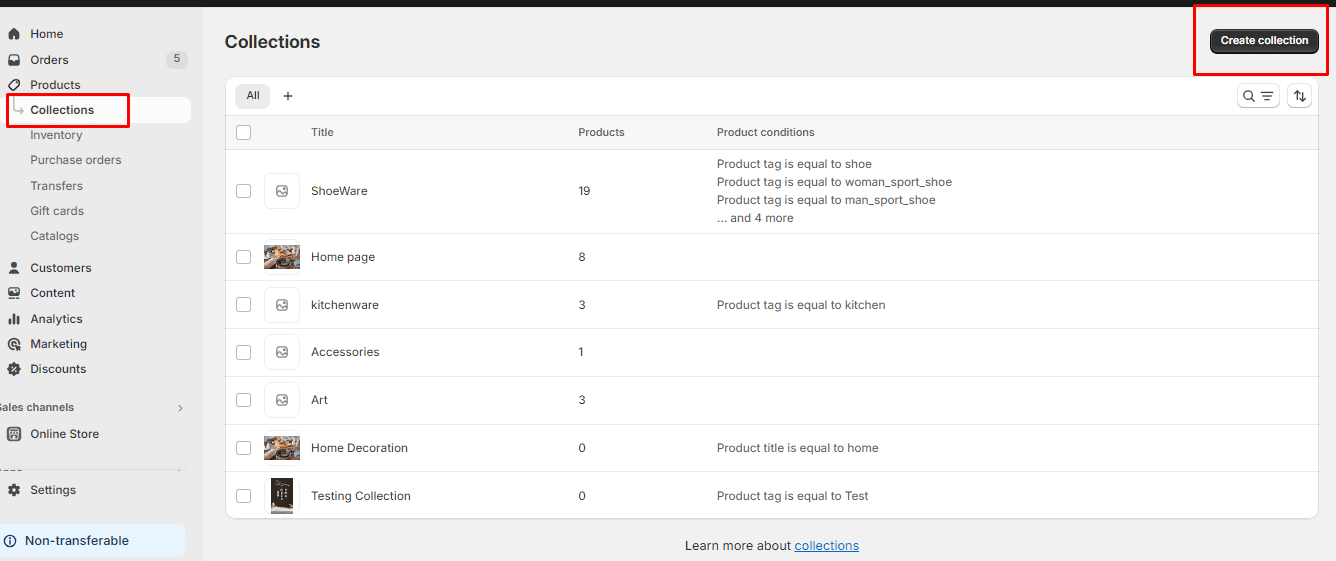
Collections simplify navigation for the visitors who visit your store. If you have a wide range of products, then it is beneficial to use the automated collections, which automatically organize products based on predefined filters.
8. Install essential Shopify Apps:
The Shopify App Store offers a plethora of apps designed to meet various business requirements, such as page building, marketing, accounting, inventory management, shipping, and beyond. Utilizing these apps enables you to customize your online store to meet specific objectives and enhance efficiency, ultimately driving profitability for your business.

When it comes to optimizing your Shopify store, leveraging the right apps can make all the difference. Here are a couple of standout apps from WebPlanex that you should consider integrating into your Shopify setup:
1. Speedboostr – Improve Your Store’s Visibility and Page Speed with SEO
2. Shopify Cashback Wallet – Drive Sales and Increase Page Engagement with Cashback Incentives
9. Create Pages and Navigation:
To create pages, you need to click on the Online Store and navigate to Pages. Then, click on the Add a new page button. Next, provide a name for the new page and save it. Repeat the process to create the remaining pages in the same manner.
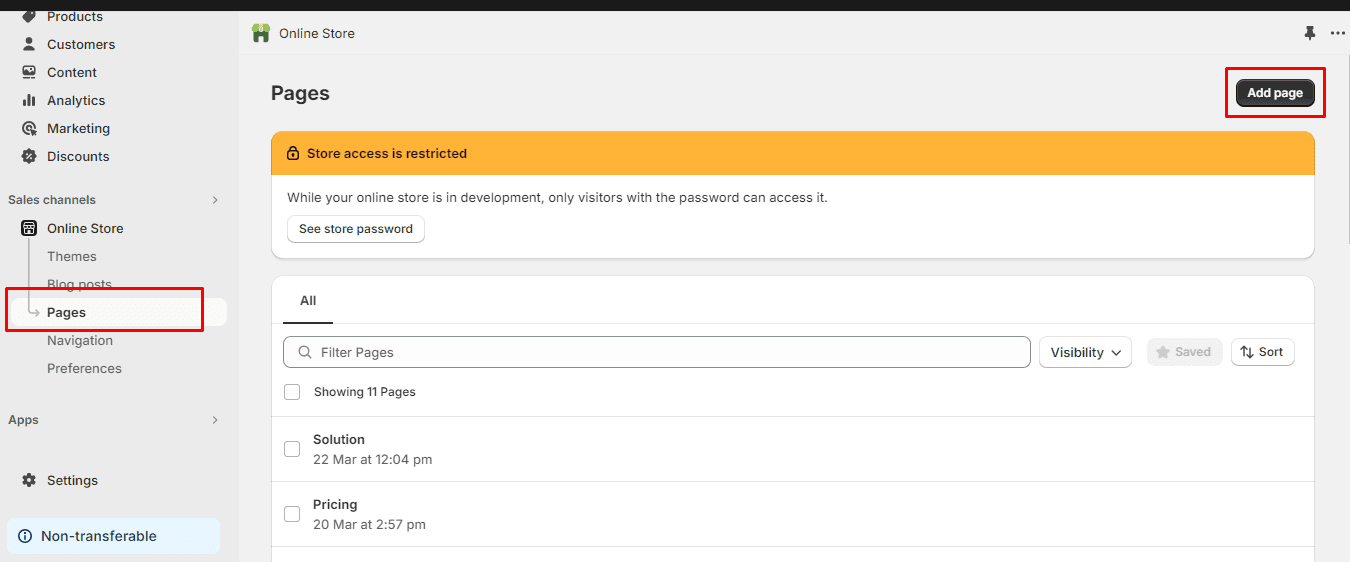
After creating pages, you are supposed to place those pages in a Menu, which is addressed as navigation in Shopify. For creating navigation, go to the Navigation and click on the Add a Menu button. Then, add the pages you wish to include in your menu.
10. Set up a Payment method for your Store:
The payment gateway is indispensable for handling transactions on your Shopify store. To set up payment methods, go to the payment provider settings and click on the Payments button. Then, complete the account setup process by submitting the necessary details, such as the statement description, transaction fees, and accepted card types.
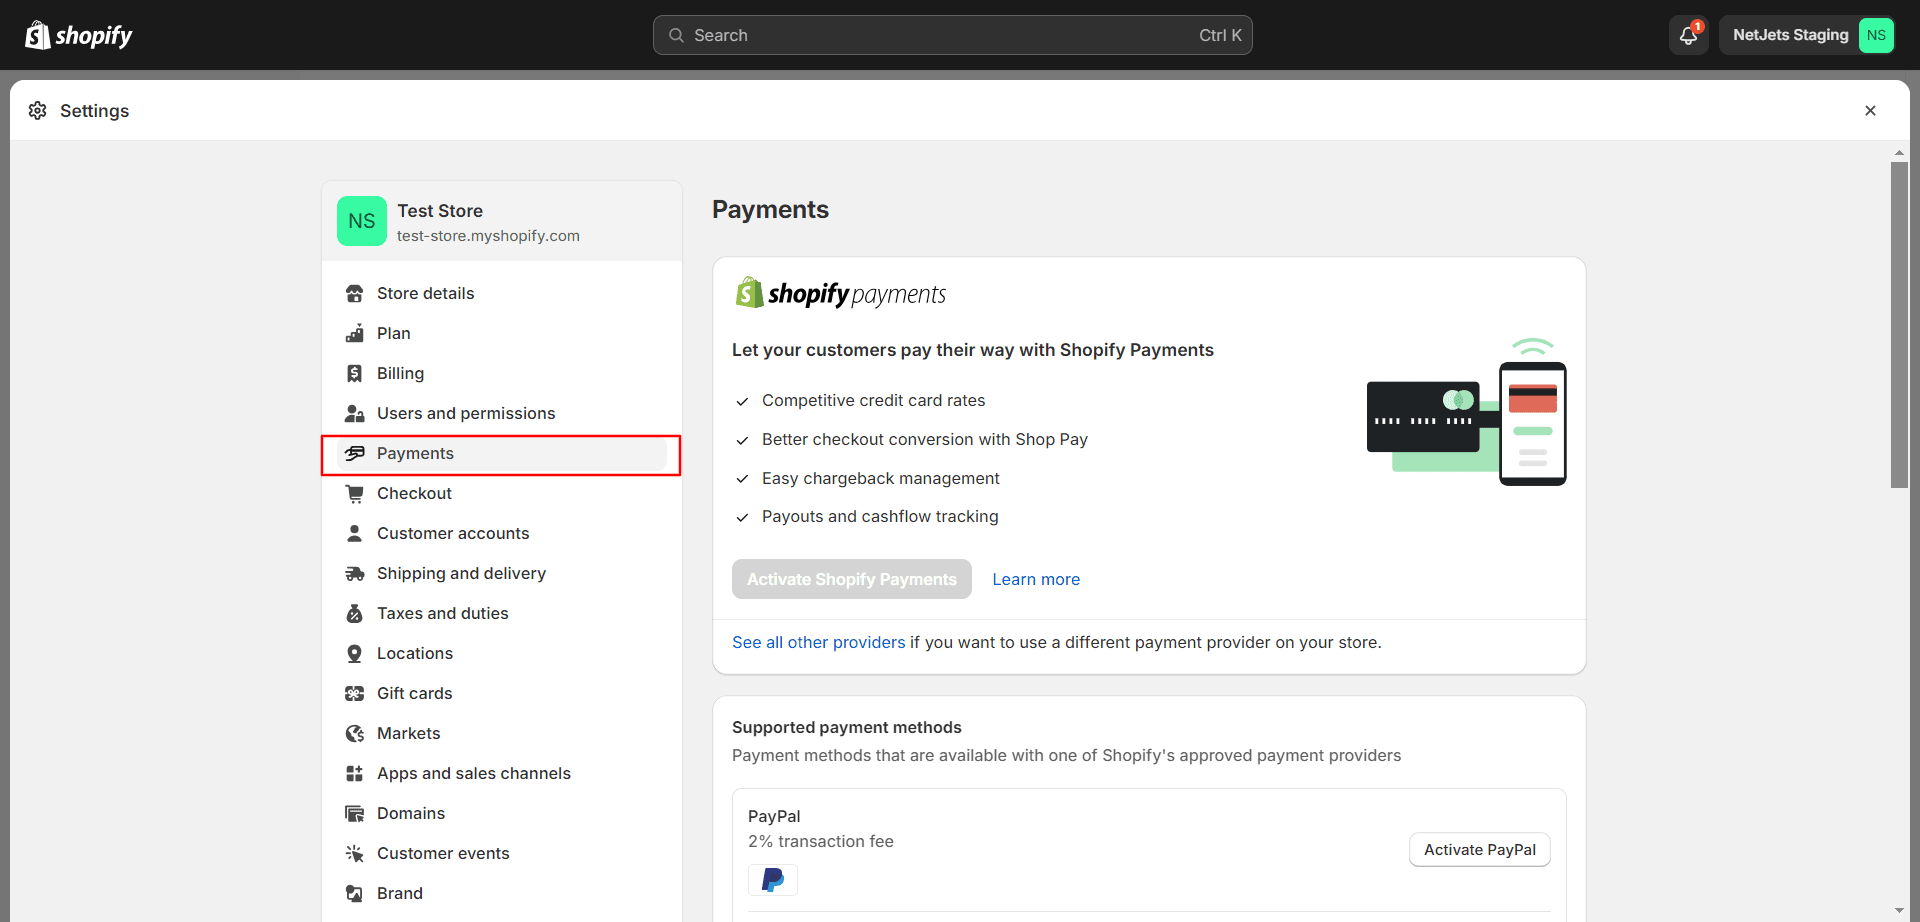
Make sure to customize checkout, shipping, and account settings to enhance the overall customer experience. Legal documents like Refund Policy, Privacy Policy, and Terms of Service should be established in the legal settings section. Ensure all necessary fields are filled out before you click on the Complete account setup.
11. Set up your Shipping methods:
To configure shipping methods for your checkout process, navigate to Settings and then proceed to Shipping and Delivery. Enter your address, establish new zones corresponding to your desired shipping destinations, and create new shipping methods accordingly. Provide a name for the new method and input your shipping prices.

12. Connect your Domain to the Shopify Store:
To connect your domain to the Shopify store, you need to go to the dashboard and then Settings. Click on the Domains button. When you click on it, you will find two options: Buy a new domain or connect an existing domain. If you already have a domain, then click on Connect an existing domain, and if you want to buy a new domain, then select the Buy a new domain option. Then press the Next button to proceed.
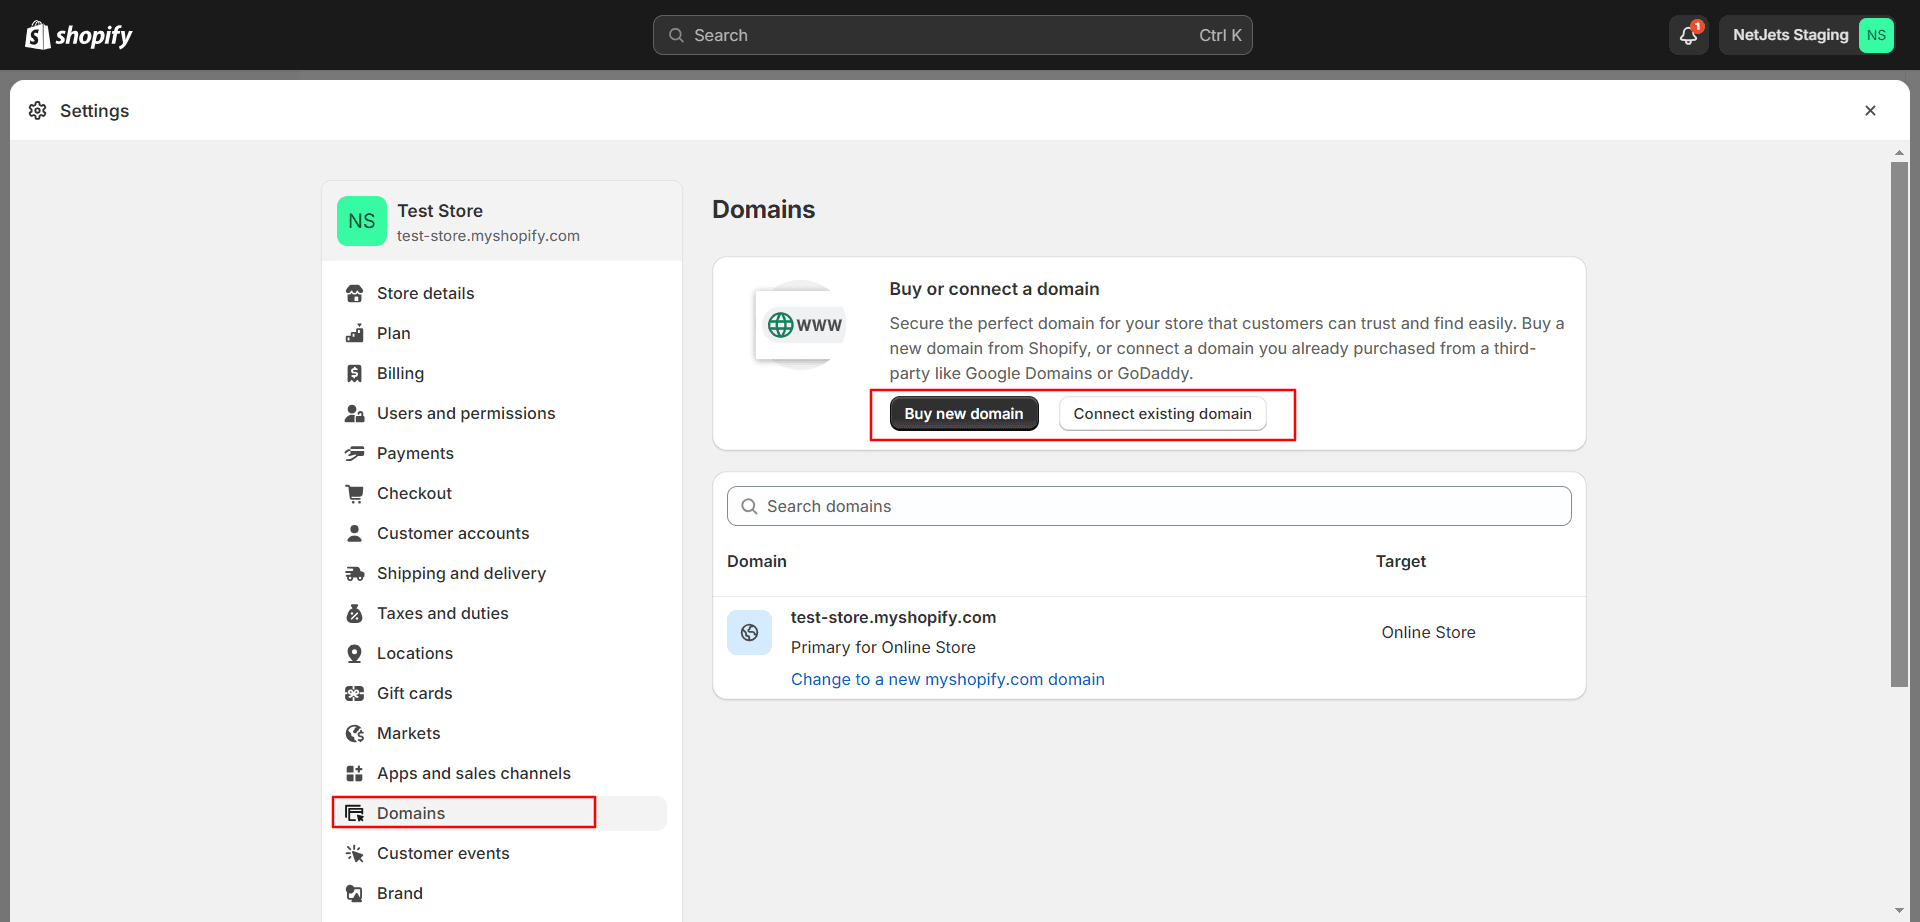
Lastly, click on “verify connection” to end the process. While the domain may connect right away, it could also take up to 48 hours to connect.
13. Run a test order:
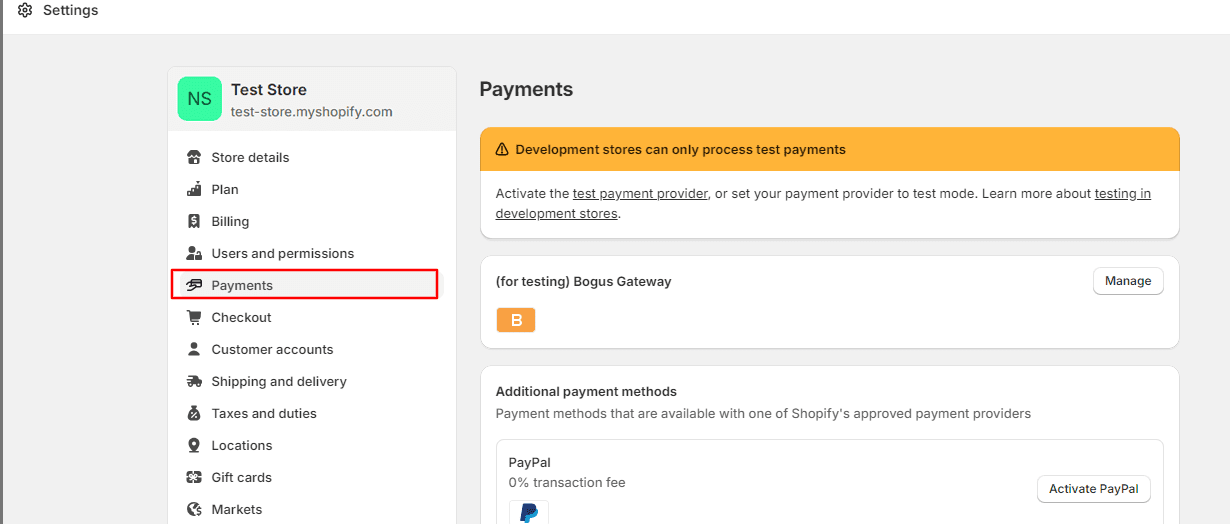
Now your Shopify setup process is done. Before you make your store public, it is very important to resolve errors. Such carelessness can leave a bad impression on customers’ minds. Don’t forget to run the tests on desktop and mobile devices as well.
To set up a Shopify test order, you need to navigate to Settings and then Payment Providers. Make a test order to confirm that the payment has been successfully processed. Double-check your spelling for accuracy. Assess the quality of your images to ensure they meet your standards. Verify that all links are functional and direct users to the correct pages.
Finally, you are ready to go live:
Now, your store is prepared to go live!
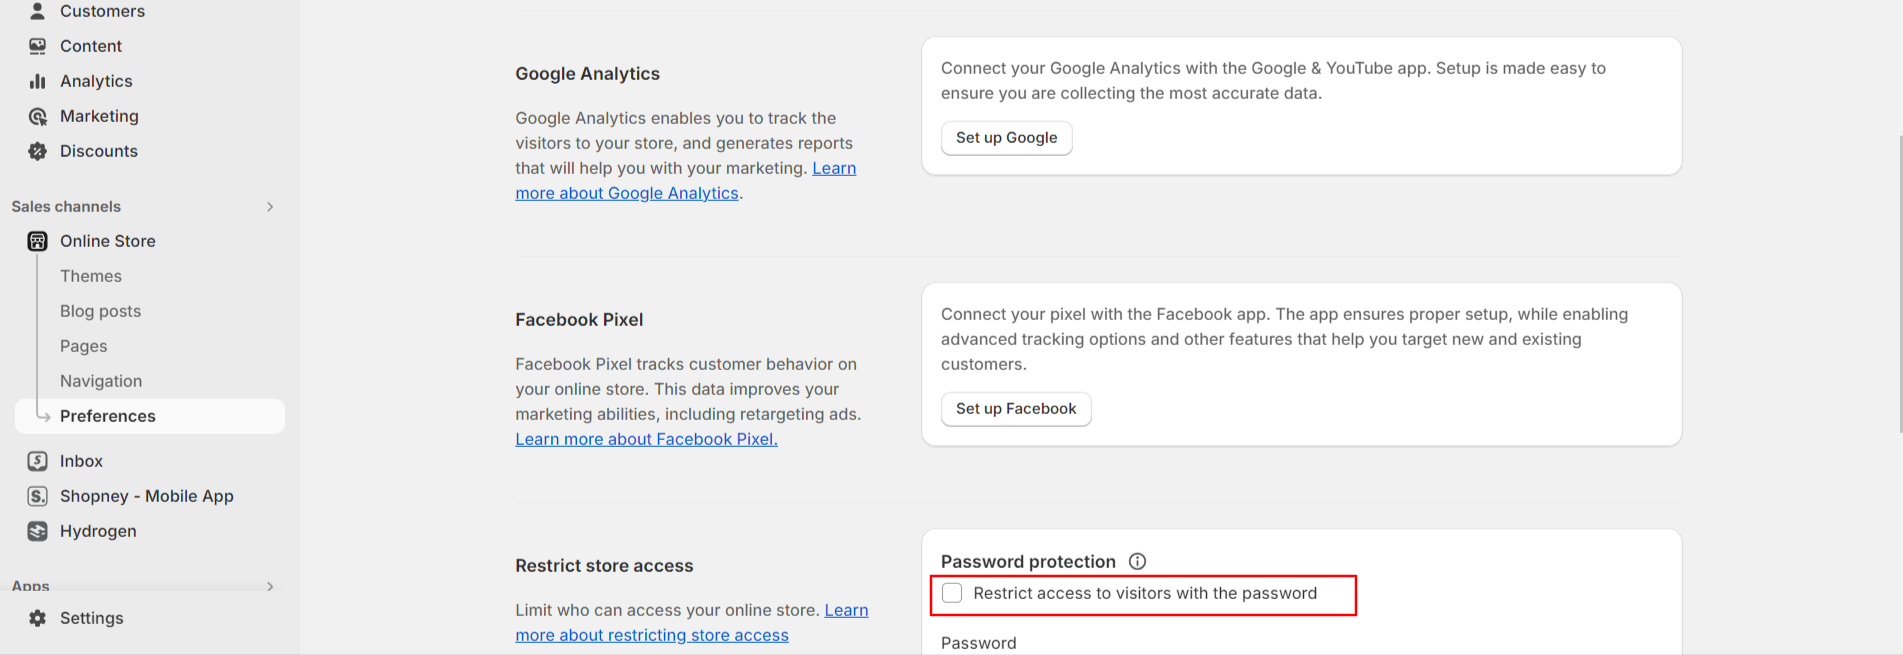
One important thing to remember before publishing your store, you need to deactivate the password on your store.
But how to deactivate the password? Firstly, click on the Online Store and go to Preferences. Then, uncheck Enabled Password and click on the Save button.
After verifying your content, head back to the Shopify admin and hit Publish my theme. Your store will now be visible to other users. Congratulations on reaching this milestone!
Conclusion:
Shopify store setup is not a lengthy process. With the appropriate tools and guidance, an aesthetically pleasing and intuitive store is achievable within a few minutes.
By adhering to the guidelines mentioned in this article, you can easily tailor your store’s theme, select suitable apps, and establish payment and shipping channels that can meet your customer demands. Moreover, you have the capability to add products, develop pages, and enhance your store’s visibility on search engines to bolster both traffic and revenue.